
This post is to create a semi automatic process to copy files from Sharepoint to your local or network folder. This automation uses Power Automate, Outlook with VBA. Is is semi auto because the Outlook VBA script needs Outlook desktop app to be open for it to execute.
If you want it to be fully auto, then you will need a VM where it is running near 24/7.
A high level explanation:
- Create a scheduled Power Automate flow to copy the files from the Sharepoint location and attached them to a Outlook email and send to the required person. (The account of the connectors used in the Power Automate must have access to the Sharepoint folder with the permission to upload and download files)
- When the scheduled email is sent, it will trigger a Outlook VBA script which will copy the files in the Outlook email and save them into the required folder specified in the script. The script will also send an “Files saved successfully” email to the person(s) mailbox mentioned in the VBA script.
Some settings have to be done and also do take note that the Outlook VBA script will only run when the recipient of the email is login to his/ her account and the Outlook Desktop app is open. In the event when the user is not login, like during weekends or on leave, the VBA script will not execute. However when the user login to Outlook later, the script, which is backlogged, will run ( ie, on Sunday, the script will not run cause the user is not working but on Monday, when the user log in to Outlook, the Sunday script will run). Therefore is it best to have a common AD account and the common account is login to some VM in the server near 24/7.
4 Settings to perform:
- Enable your PC or VM to launch Outlook app automatically when login to Windows. This is optional, the user can manually open Outlook when login to Windows. Please refer to my video below:
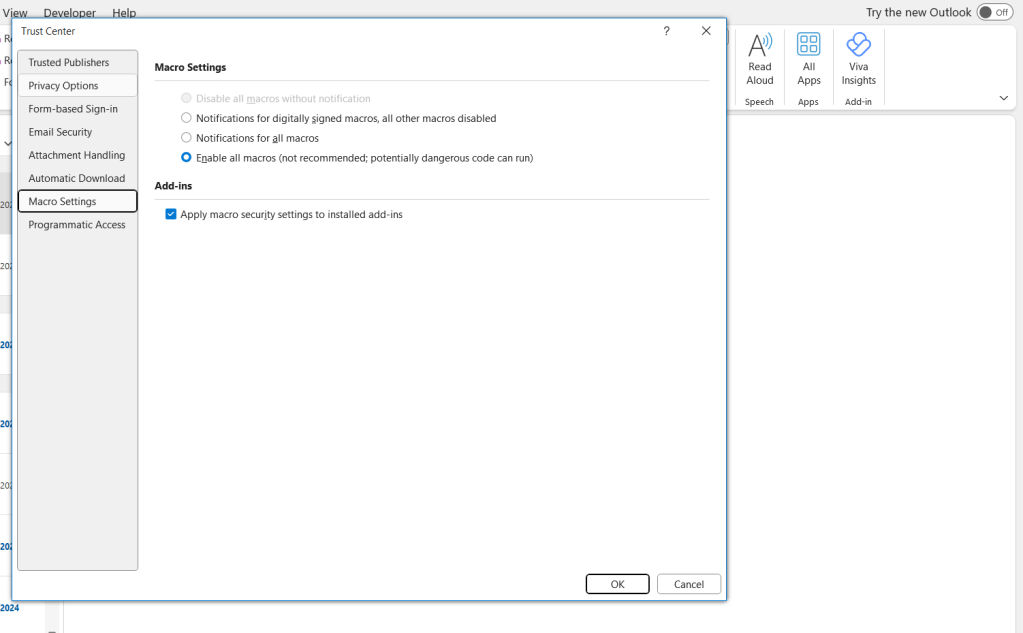
2. Enable macros for Outlook. Please refer to screen shots below, the location of macro settings in Outlook is : File –> Options –> Trust Center –> Trust Center Settings –> Macro Settings. Then follow below pic for the selections, then click OK.
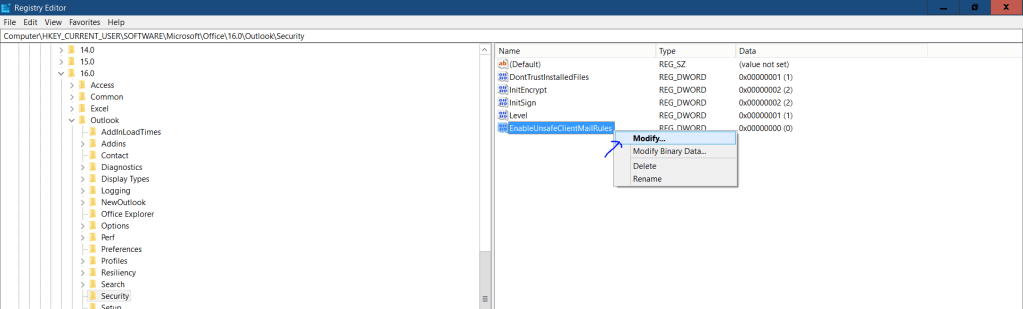
3. By default Outlook does not have the ‘run a script’ selection under the “Manage Rules & Alerts”, therefore we have manually enable it via the Registry Editor. See below pics on the steps, follow strictly and ensure not to change any other registry settings. In the search bar type “Registry Editor”.
Navigate to the path shown below, base on the version of Office that you are using. Mine is 16.0.


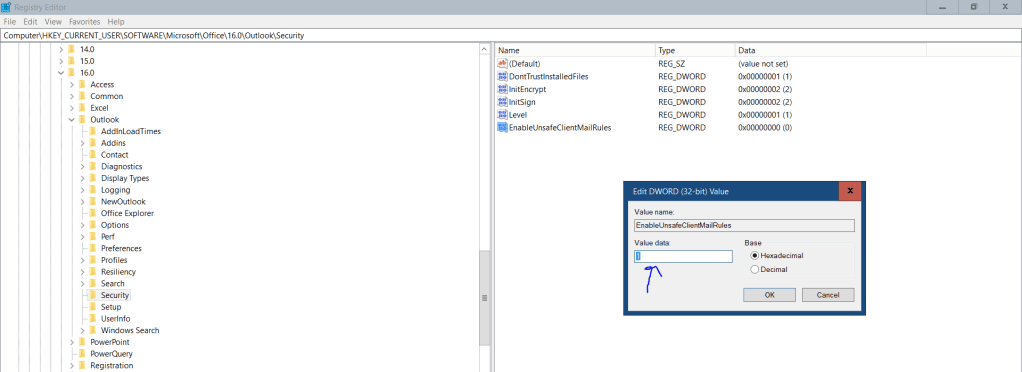
Restart Outlook.
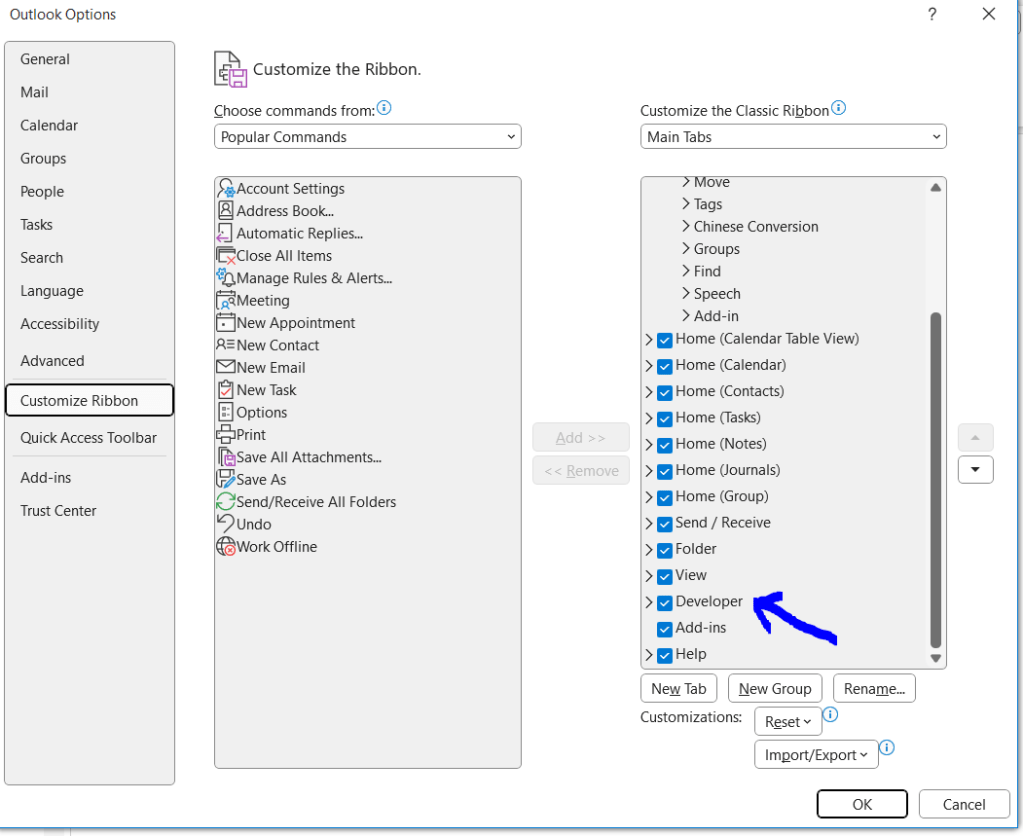
4. Add the “Developer” tab in the Outlook ribbon. In Outlook go to Files –> Options –> Customize Ribbon. Select the developer check box as show below, click OK.
After the setting are completed, Now we can start to build the automation process. The 3 steps are:
- Create the Power Automate flow to download the Sharepoint files and attached them into the email and send the email out.
- add the VBA code into Outlook VBA.
- Set the Outlook rules to trigger the VBA script when the email sent by Power Aiutomate is received. The script will save the files to your local or network folder.
1 Create the Power Automate flow
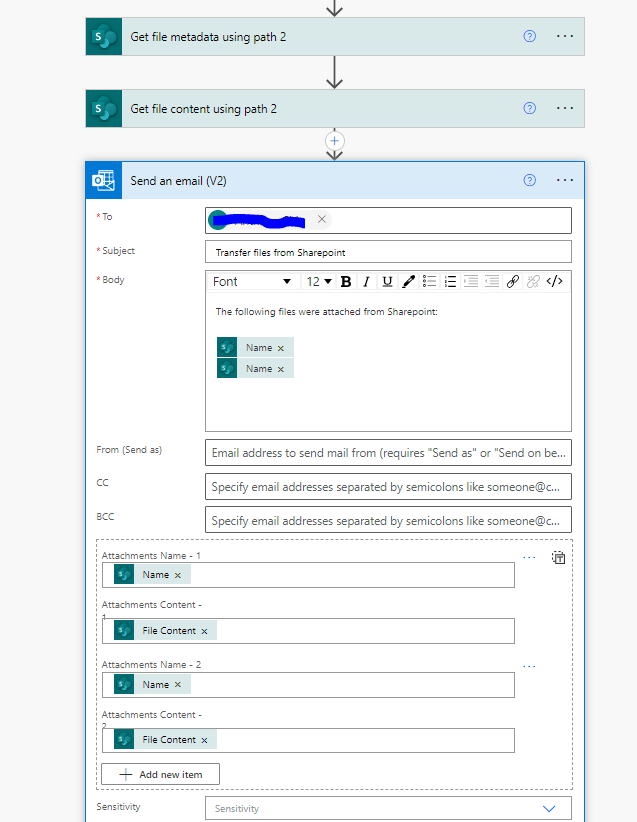
Refer to the below screenshots, my flow is a scheduled flow which will trigger at certain time, eg, 5pm. I have attached 2 attachments in the email. I have experiment with total attachments size of 50 MB, no issue, I think the total attachments limit is 150MB for Microsoft office 365 subscription.

Continuation of the Power Automate process flow………..
2. add the VBA code into Outlook VBA.
Navigate to the VBA panel , click, Developer tab –> Visual Basic —> Insert —> Module —-> . Or you can key Alt + F11 to access the VBA panel. See pics below then paste the VBA code into the Editor.


Paste the VBA code into the Editor, change the necessary variable like email address, file path.
Public Sub SaveAttachmentToFolder(Item As Outlook.MailItem)

Dim Attachment As Outlook.Attachment
Dim SaveFolder As String

SaveFolder = "C:\Users\xxxxxxx\Documents\BackUp files from Sharepoint\"   '<----- the location to save the attachments when email comes in

For Each Attachment In Item.Attachments

Attachment.SaveAsFile SaveFolder & Attachment.DisplayName

Next


'Send email to team after files are saved

Dim OutlookApp As Outlook.Application
Dim OutlookMail As Outlook.MailItem

Set OutlookApp = New Outlook.Application
Set OutlookMail = OutlookApp.CreateItem(olMailItem)

  With OutlookMail
    .BodyFormat = olFormatHTML
    .Display
    .HTMLBody = "Hi Team" & "<br>" & "<br>" _
        & "Backup Daily data files from Sharepoint to shared folder - Successful. "


    .To = "abcd@company1234.com"   '<----- the email address to send to
    .CC = ""
    .BCC = ""
    .Subject = "Backup Daily data files from Sharepoint to shared folder - Successful"
    .Send

  End With

End Sub
3. Set the Outlook rules to trigger the VBA script when the email sent by Power Aiutomate is received. The script will save the files to your local folder.
Follow the pics for the steps:


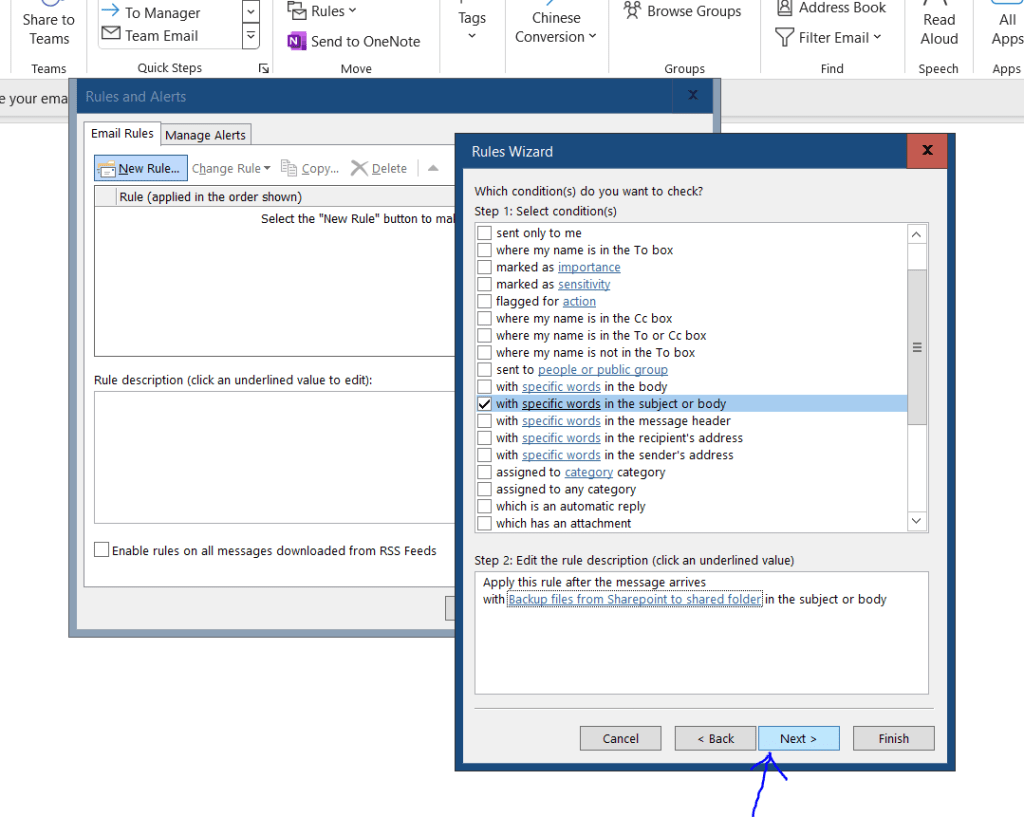


When you trigger the Power Automate process, the email will be send to you inbox, the VBA script will be trigger by the email subject and save the attachments to the required location in the VBA script.
The 2nd part of the VBA script which send another email informing about the completion of the task is optional,
